Hello Fellow Mobsters,
I am going to walk you through the way I wash my yeast for reuse.
We all know that healthy viable yeast is the key to making great beer, and we also know that those little vials and smack packs are pretty damn expensive. So why not take advantage of the abundance of sleeping yeasties in the bottom of your fermenter and reuse them. I know a lot of people will just pitch on the cake, but I don't feel like this is a good sanitary practice and I like to know I am using healthy yeast which is one of the reasons, besides increasing your cell count, for making starters. If the starter smells and tastes good, and you have a nice krausen ring evident in your starter vessel, then you are good to go.
There are a few situations where you would not want to wash and reuse your yeast. If your yeast has been stressed due to out of control fermentation temps you should not wash and reuse. I would not recommend washing yeast from big beers (beers with OG's over 1.070) these yeasties will also be somewhat stressed and overworked. If you have added fruit, spices, coffee beans, chocolate, etc... I would not recommend washing and reusing. If you dry hop directly in your fermenter like I do (toss the pellets in) washing and reusing is just fine, the hops will settle below the yeast as you will see in my pictures below.
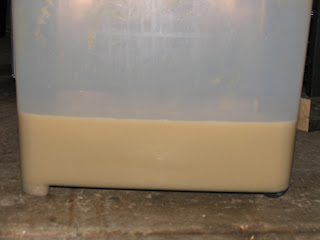
The yeast cake that is pictured in the walk through is from 12 gallons of leftovers IPA with an OG of 1.061, it was dry hopped with 4oz's of pellet hops.
Here is what you will need to get started.
1.) Canning jars these can be quart or pint sized, I use 12 quart size since I do 12 gallon batches, and use my HLT for boiling the jars and lids (lots of space in the HLT)
2.) Large pot that you can fit the jars and lids in ( I use my HLT).
3.) Kitchen Tongs preferably Stainless Steel.
4.) Starsan or your favorite Sanitizer
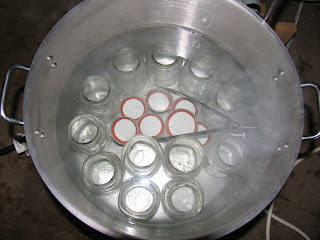
Step 1: Place your caning jars standing upright in your pot with the lids and tongs, fill the pot up about an inch past the top of the jars make sure the jars are full. Boil for 20 minutes, this will sanitize and also boil off the oxygen in the water to help put the yeast to sleep.
Step 2. Remove the jars keeping them full of water and place the lids on . Let the jars cool to below 70F. Spray outside of jars with Starsan as well as your working surface.
Step 3. Pour water from jars into your fermenter swirl gently to get everything mixed well.
Step 4. Wait 20 - 30 minutes to let the trub and hops settle.
Step 5. Carefully pour the creamy liquid into 7 of your canning jars be careful not to disturb the junk on the bottom. Let them sit for 20 minutes more junk will settle on the bottoms.
Step 6. Carefully pour the creamy liquid from your 7 canning jars into the remaining 5 empty jars again be sure to leave behind the junk that has settled. Be sure to fill all the way to the top leaving no head-space.
Step 7. Mark these jars and place in the refrigerator, after a couple of days the yeast will settle to the bottom and the liquid on top will be the color of beer.
When you are ready to use the washed yeast, decant the liquid off the top leaving the creamy yeast band on the bottom, bring up to pitching temp and pitch in your starter. I use Jamil's pitching rate calculator to determine how many ml's of slurry and how big of starter I need. The harvest date should be set to your brew date. You can reuse yeast for about 5-6 generations. Good luck and make sure you practice good sanitation.
Cheers,
Ross


